Nutritious, economical food.

January 12, 2021

4 Ingredient Fruit Cake!

Filed under: Baking,Recipe,Uncategorized — David Sugden @ 5:39 pm
Tags: , , , , , ,

I’ve baked this cake a few times now and each time it has come out of the oven as planned and tastes delicious. I’ve no idea how long it will keep because we never seem to have it long enough to find out.  It’s good on its own and it’s good for a bit of energy-input when you’re out walking, but most of all it’s good with a bit of cheese: any cheese really, but a nice sweet Cheshire, Wensleydale or Lancashire all do it for me.

Original Recipe can be found here.

INGREDIENTS

1 Kilo        Mixed Dried Fruit
(I get mine from Tesco with my ‘lockdown’ delivery – but I guess you can mix your own)
400g         Tin Condensed Milk
(Depending on the brand you buy, this could be 397g or 410g – I’ve used all three and had no problem)
¾ Cup       Bailey’s Irish Cream.
(I got a bottle of Irish Cream from Tesco for £3.95 and it’s been fine – so no need to break the bank
2 Cups      Self-Raising Flour.

METHOD

  • Combine the dried fruit, condensed milk and Baileys along with 1/2 cup water.
  • Mix well, cover and refrigerate overnight.

Remove from the fridge when you’re ready and stir the mixture well, allowing it to come to room temperature.

  • Preheat oven to 150C.
  • Grease and line a deep 20cm round cake tin with baking paper.
  • Fold flour through soaked fruit, making sure that all of the flour is mixed in – no loose floury bits should be left.
  • Pour into prepared tin and smooth the top.
  • Bake for 2 hours until a skewer inserted into the centre comes out clean.

Check cake after about 1½ hours. If it is browning too quickly, cover with foil.

December 16, 2020

Artisan Bread (no need to knead)

Filed under: Baking,Bread,How to,Recipe — David Sugden @ 5:16 pm
Tags: , , , , , , , ,
Artisan Bread

INGREDIENTS

440g                        Strong Flour (3¼ cups)
2 level teaspoons      instant yeast (I used 1 x 7g sachet)
2 level teaspoons      coarse salt (I used Cornish sea salt crystals)
360ml                      cool water (i.e. room temperature) (1½ cups)
optional:                 Semolina (or polenta) for dusting pan

5-10 minutes work

  • Use a large un-greased mixing bowl.
  • Whisk the flour, yeast, and salt together.
  • Pour in the cool water and gently mix together with a rubber spatula or wooden spoon.
  • The dough will seem dry and flakey, but keep working it until all the flour is incorporated. If needed, use your hands. The dough will be sticky.
  • Shape the dough into a ball as best you can.
  • Place it back in the bowl (I used a clean bowl that would fit in the fridge).
  • Cover the dough tightly with cling film and set aside at room temperature.
  • Allow to rise for 2-3 hours. The dough will just about double in size, stick to the sides of the bowl, and have a lot of air bubbles.

After 2-3 hours.

You can continue with the next step immediately, but for absolute best flavour and texture, the original author recommends letting this risen dough rest in the refrigerator for at least 12 hours and up to 3 days.

  • Place covered dough in the refrigerator for 12 hours – 3 days.
  • I let it rest in the refrigerator for almost 24 hours. The dough puffed up a bit during this time. It may begin to deflate after 2 days. That’s fine and normal– nothing to worry about.

When you’re ready to bake

  • Dust a large non-stick baking sheet with plenty of flour and/or preferably semolina.
  • Turn the cold dough out onto a floured work surface.
  • Using a sharp knife or bench scraper, cut dough in half. Some air bubbles will deflate as you work with it.
  • Place dough halves on prepared baking sheet and using floured hands, shape into 2 long loaves about 9×3 inches each, about 3 inches apart.
  • Loosely cover and allow to rest for 45 minutes.

Preheat the oven to 475°F (246°C).

  • When ready to bake, score the bread loaves with 3 slashes, about 1/2 inch deep. If the shaped loaves flattened out during the 45 minutes, use floured hands to narrow them out along the sides again.
  • Place the shaped and scored dough in the preheated oven on the centre rack.
  • Bake for 20-25 minutes or until the crust is golden brown. Gently tap the loaves– if they sound hollow, the bread is done.

Adapted from: https://sallysbakingaddiction.com/homemade-artisan-bread/

December 15, 2020

Never Fail White Bread

Filed under: Baking,Bread — David Sugden @ 7:05 pm
Tags: , , , , ,

INGREDIENTS

650g           Strong flour
1 tsp.          Salt
2 tsp.          Sugar
2 tsp.          Dried yeast (now 1 x 7g sachet)
1½ tablsp.  Sunflower oil (add to lukewarm water)
400ml          Lukewarm water (Approx.)

METHOD

Mix all the dry ingredients together; add yeast last so it isn’t in contact with salt or sugar for too long.

Now add the lukewarm water and oil. The amount of water is roughly correct, the exact amount required will depend on the absorbency of the other ingredients that you are using. So, don’t add it all at once, add about ¾ and see how you go. For today, I used the 400ml water and just a tiny bit more. Only experience can tell you when the dough is just right for kneading – not too stiff and not too soft.

Knead this well now. Aim to knead for 8-10 minutes. Nice and steady as you go; after about a minute the dough should stop requiring tiny bits of scattered flour to stop it sticking – it should simply allow itself to be kneaded without sticking. It should become more elastic, the more you knead it. It is pretty much impossible to manually over-knead dough,

Now, place into a clean bowl (I spray my bowl with a thin film of oil first), cover with cling film and leave in a warm place to prove. For about an hour until the dough has doubled in size. Today, mine took 75 mins. Once it has doubled in size, take it out of the bowl and ‘knock-it-back’. Then fit it into your well-oiled tin. If your tin is like mine and sticks, then line it with greaseproof paper – oiling both the tin and the paper.

Cover loosely with cling and put back somewhere warm to re-prove – again double(ish). Mine took 45 minutes today.

At this point, I turned my oven on and set it at 80oC. I also placed a tray of water on the bottom shelf of the oven at this stage.  When the bread is ready to cook, place it onto the middle self and turn the oven up to 200oC. This allows the dough to complete its rise as the oven comes up to temperature. Leave the water in the oven throughout – it provides the damp atmosphere that the bread enjoys.

The loaf will take around 25-35 minutes to cook, including the warm-up time. Once it looks ready, remove it from oven, take out of the tin and put the loaf back on the middle shelf for two minutes, just to finish it off.

Cool and eat.

December 11, 2020

Green Tomato Chutney

Filed under: Fruit,How to,Vegan,Vegetables,Vegetarian — David Sugden @ 6:10 pm
Tags: , , , , ,

I’ve never really had a green tomato chutney that wasn’t too sweet, so this year, with an abundance of green (cherry sized) tomatoes, I thought I’d make my own. I looked on the internet for a recipe – but each one was different. So different in fact, that I had to go back to basics first and for a base line I checked the Green Tomato Chutney listed in the ‘The Star, Ration-time Cookery Book, by Hilda M.K. Nield. (1/-), then using that as a base-line along with the recipe found at https://www.bbc.co.uk/food/recipes/how_to_make_chutney_57366 I set about my task.

Finished product

1Kg of my Frozen Green Tomatoes
Accidently, I didn’t get them out until morning so by the time I needed them they were only half  defrosted and much easier to cut up into small pieces.

2 x medium sized onions –  These were just chopped. A bit bigger than I’d chop them for chilli, Bolognese etc.
1 x red Chilli – very finely chopped
1 large cooking apple
2 x t.sps of chopped dried chillies
1 x Red Pepper
– chopped same size as onions (gives the finished product some colour)
1 x t’sp chopped garlic
1 x t’sp chopped fresh ginger

Seasonings (I used white pepper, ground cumin, black pepper)
1½ t’sp salt
500ml malt vinegar
60g Sultanas
60g Raisins
200g Light brown sugar

  1. Peel, core, then roughly chop the apple. Roughly chop the onions and other vegetables in use.
  2. Place the apple, onion, garlic, ginger, chilli flakes, mixed fruit and seasonings into a large, wide saucepan.
  3. Stir in the vinegar, sugar and salt.
  4. Stir the mixture over a medium heat until all the sugar has dissolved.
  5. Meanwhile, chop the tomatoes and add them to the mixture as it comes to the boil.
  6. Once everything is in the pan, bring to the boil, then reduce the heat slightly and simmer the chutney for around one hour, stirring every so often.
  7. As it thickens, stir more frequently and watch that the sugar does not begin to stick to the bottom of the pan.
  8. The chutney is done when you can scrape a wooden spoon across the bottom of the pan and the chutney does not flow back into the gap (also see same tip on Delia link) – mine reached 100oC.

I prepared the jars (all ex-jam or pickle etc.) by putting them through a dishwasher cycle, allowing them to dry (drying the lids carefully with kitchen roll) and then filling with the finished hot chutney. You’ll find LOTS of advice online about filling jars etc. I simply filled the jars, added a disk of greaseproof paper, added the lids and turned the jars over. Simple.  Let’s see how long it lasts.

Note: Green Tomato and Plum Chutney

I have since, made this again, substituting the apple with plums, reducing the tomatoes and doubling the garlic and ginger.

  • 800g Green tomato
  • 800g Plums

After coming out of the freezer, the plums were perfect to de-skin and de-pit after 2.5 hours. The tomoatoes were then ready after 3 hours. Other than that (and the double garlic and ginger) everything was the same.

February 28, 2020

Puy Lentils

Filed under: How to,Pulses,Recipe,Vegetarian — David Sugden @ 4:41 pm
Tags: , ,

Ingredients

  • 100g    Puy Lentils
  • ½         Onion diced
  • ½         Carrot diced
  • 50g      Smoked Bacon lardons
  • 500ml  Veg stock (I used Knorr – but might work with chicken)
  • T/sp     Tomato Puree
    Seasonings:

    • Pepper,
    • Oregano,
    • Cumin (salt at very end)

Method

  1. Fry off all bacon and half of the onion.
  2. Boil, then simmer lentils and rest of onion for around 15 minutes.
  3. Add carrots, T.P. and seasonings, simmer for another 15 minutes.
  4. Add cooked bacon and onion, simmer for final(ish) 15 minutes.
  5. Adjust seasoning, add salt to taste.

2-3 Portions

I made this the day before I wanted it and it warmed up nicely. It would be just as nice without the bacon and would be even better with some nice butcher’s sausage (not supermarket stuff).

October 3, 2019

Carrillada

Filed under: How to,Meat,Recipe — David Sugden @ 3:29 pm
Tags: , , , , , , , ,

I used eight pigs’ cheeks, thinking we would need two each, but one each was plenty, as part of a series of tapas – none too small.
The second time I tried this dish, I used the quantities shown in blue. See notes below too.

Ingredients

  • 8                       Iberico pig cheeks (approx. 600 gram) … [1kilo]
  • 1 large            Onion … [2.5 medium]
  • 1 med              Carrot – peeled and sliced … [2]
  • Flour               seasoned with salt and pepper – to coat
  • 2 large            Garlic Cloves – crushed and added to onions … [3 medium]
  • 150ml              Sweet Sherry (Pedro Ximinez) … [200ml – used Malaga sweet wine]
  • 400ml              Beef stock … [450ml]
    • (I used a general Spanish Caldo de Cocina, but think beef would be better)
  • 1 des/sp.         Tomato Puree … [Tbl’sp]
  • ½ t/sp.             Cumin
  • 1 t/sp.              Paprika
  • ½ t/sp.             Cinnemon
    • Sage
    • Thyme

Method

  1. Finely chop the onion,
  2. Season the flour (salt and pepper),
  3. Add oil to frying brown, heat and the lightly colour the onions (be careful not to burn the garlic),
  4. Remove onions and add to waiting (clean and empty) pressure cooker,
  5. Dredge cheeks in seasoned flour and brown them in frying pan – do not over fill.
  6. Once browned all over, add to onions in pressure cooker – brown cheeks in batches,
  7. Now add a little more fat to frying pan and make a roux with some of the remaining seasoned flour.
  8. Add cumin and paprika and herbs if using,
  9. Add tomato puree and cook for a few minutes.
  10. Pour in the sherry and scrape the pan, to collect all the onion, garlic and cheek residue.
  11. As the sherry reduces add the beef stock, enough to make a thickish, rich sauce.
  12. Add the carrot slices, bay leaves and bring to the boil before adding to the meat and onion in the pressure cooker.

Now everything is in the pressure cooker, gently bring back to the boil and simmer for a couple of minutes before closing pressure cooker, bring up to temperature and cooking for one hour.

p1020462

Notes

I served the cheeks as a tapa, with lots of sauce and bread to dip. I froze the ones we didn’t use and they defrosted excellently. I reheated those and served with creamy mashed potatoes and more carrots. Delicious.

I used 50% sherry and 50% stock (mine was a little light on flavour, so do use beef).  I also added a little honey, but the finished product, although really tasty, was a little sweet. I think therefore that 3:1 stock to sherry is probably correct – but I will come back and alter if necessary, when I make it again.

The second time I tried this dish, I used the quantities shown in blue. I’d bought the cheeks in the UK and whilst they were ok, they were not butchered as well as I could get in Spain. As a result I had lots of smaller pieces and as a result some ‘caught’ while cooking. As a tip, I guess that in future I would set the onions aside and set the cheeks aside and THEN add them to the sauce, after it had been put into the pressure cooker.

January 21, 2018

Terrina de Cerdo

Filed under: How to,Meat,Recipe — David Sugden @ 7:09 pm
Tags: , , , , , ,

Well, it’s been a while since I came here and published something here. This is something I developed, cooked and tested in Spain.

Ingredients

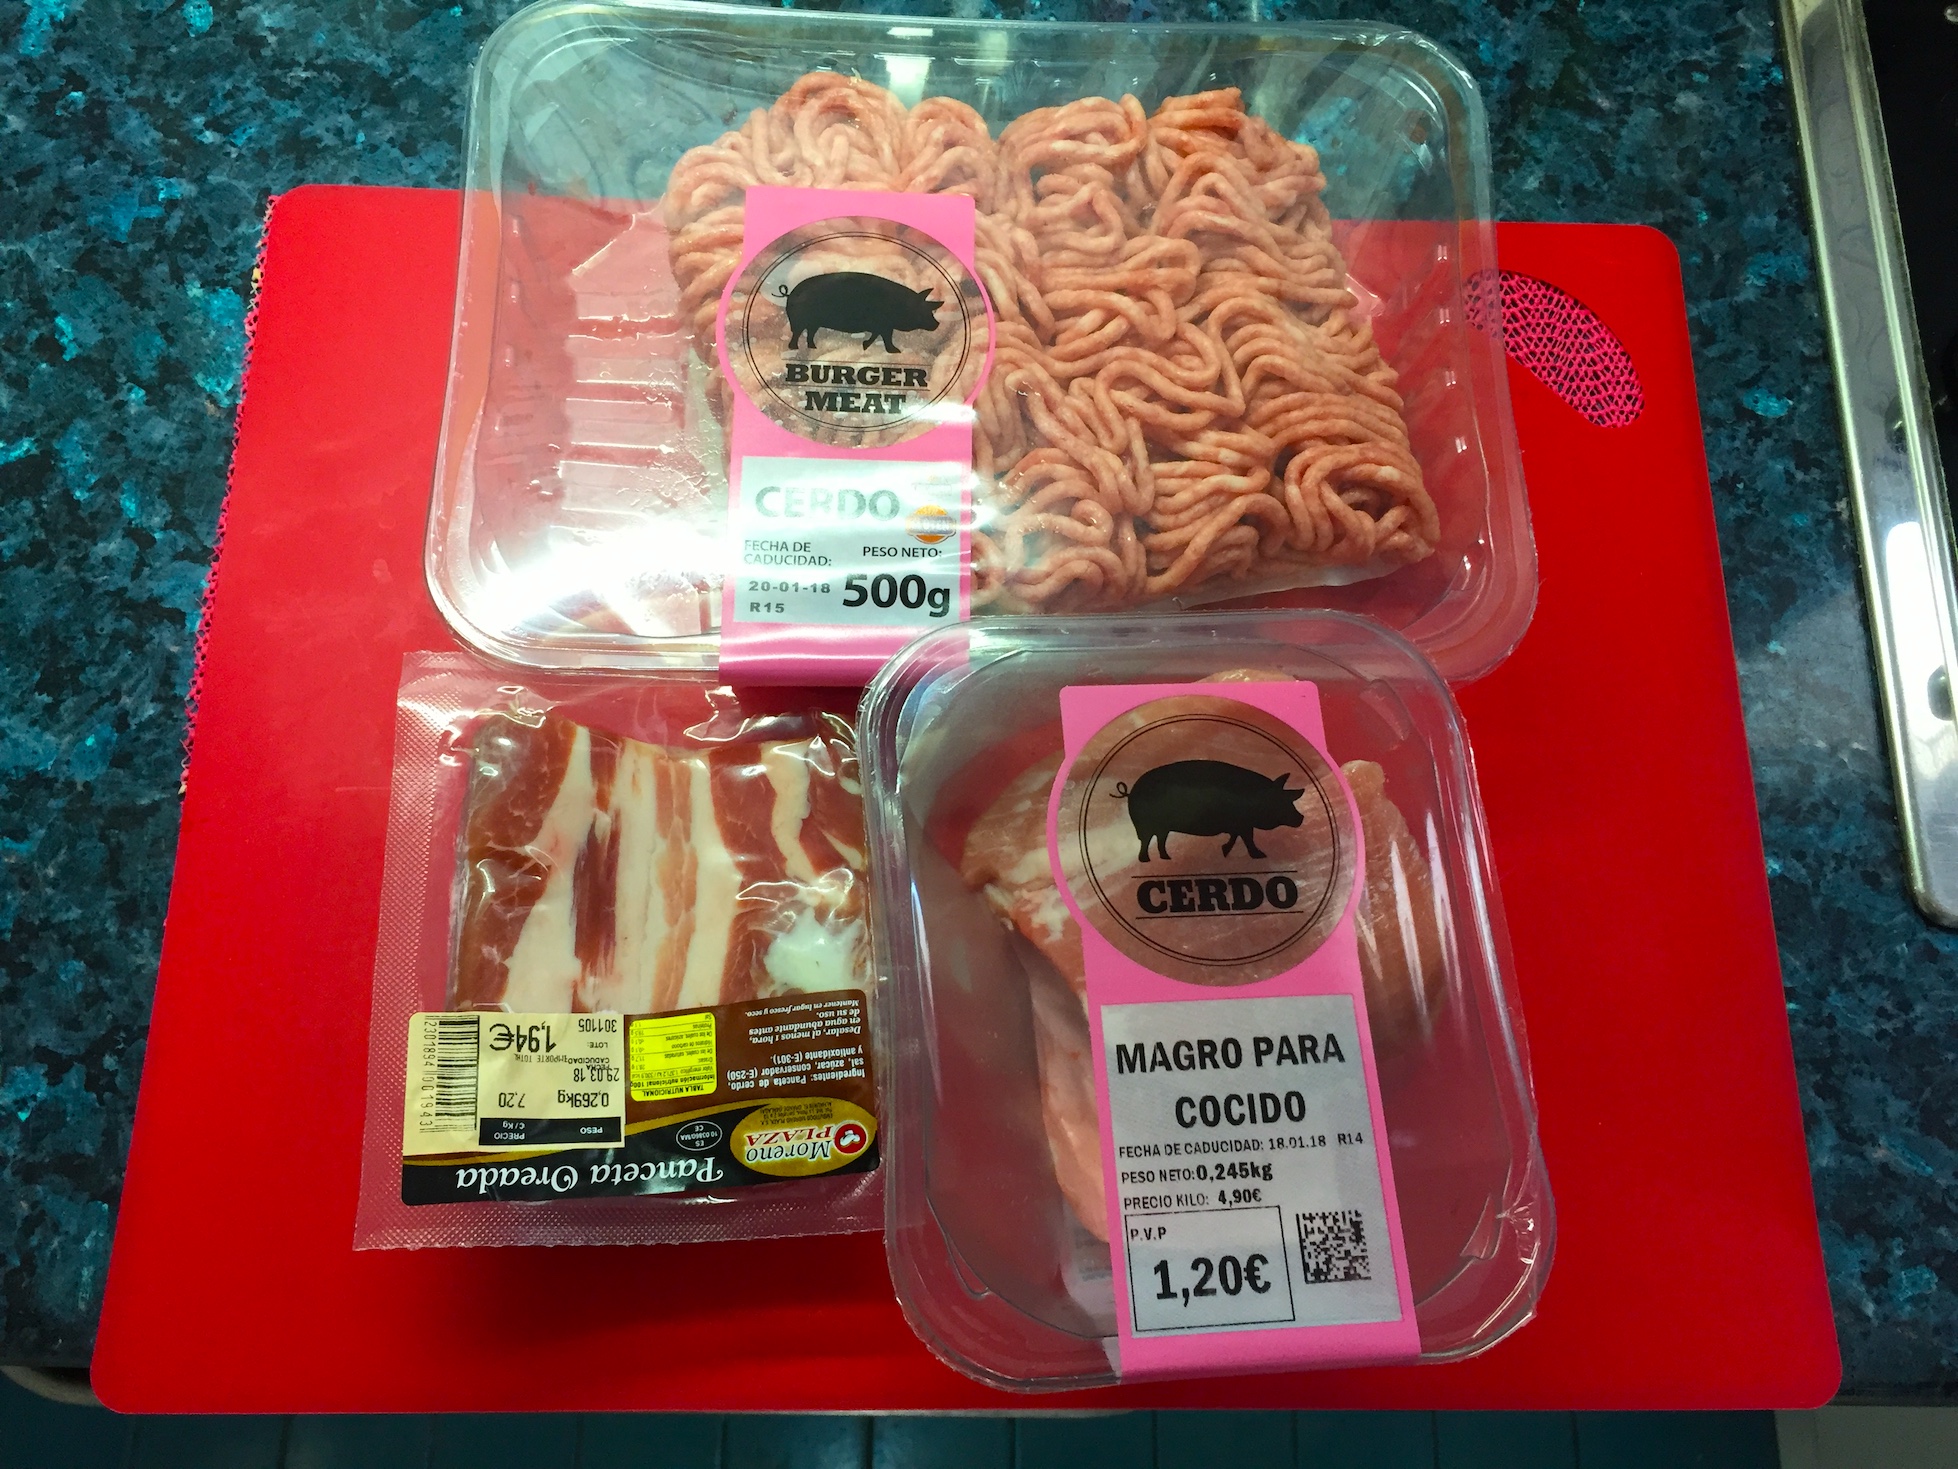
  • 500 grams       Fairly fatty (16%) minced pork (the cheaper burger mince in Mercadona)
    [or mince your own shoulder or belly of pork] €2.10 (about £1.90)
  • 260 grams       Fairly fatty bacon (I used Mercadona pancetta pieces)
    [or use streaky bacon] €1.94 (about £1.75)
  • 240 grams       Lean pork (again Mercadona do a Magro de cocido – lean pork shoulder)
    [or use loin of pork] €1.20 (about £1.10)

It didn’t seem like 1 kilo of meat when I was buying it, but there you go. I’ve used 25% bacon, but it could be up to 50% bacon or gammon/ham (not Spanish ‘York’ ham or the iberico/serrano types).  Ideally all would be minced together and about half put back through the mincer before combining with other ingredients.

IMG_9524

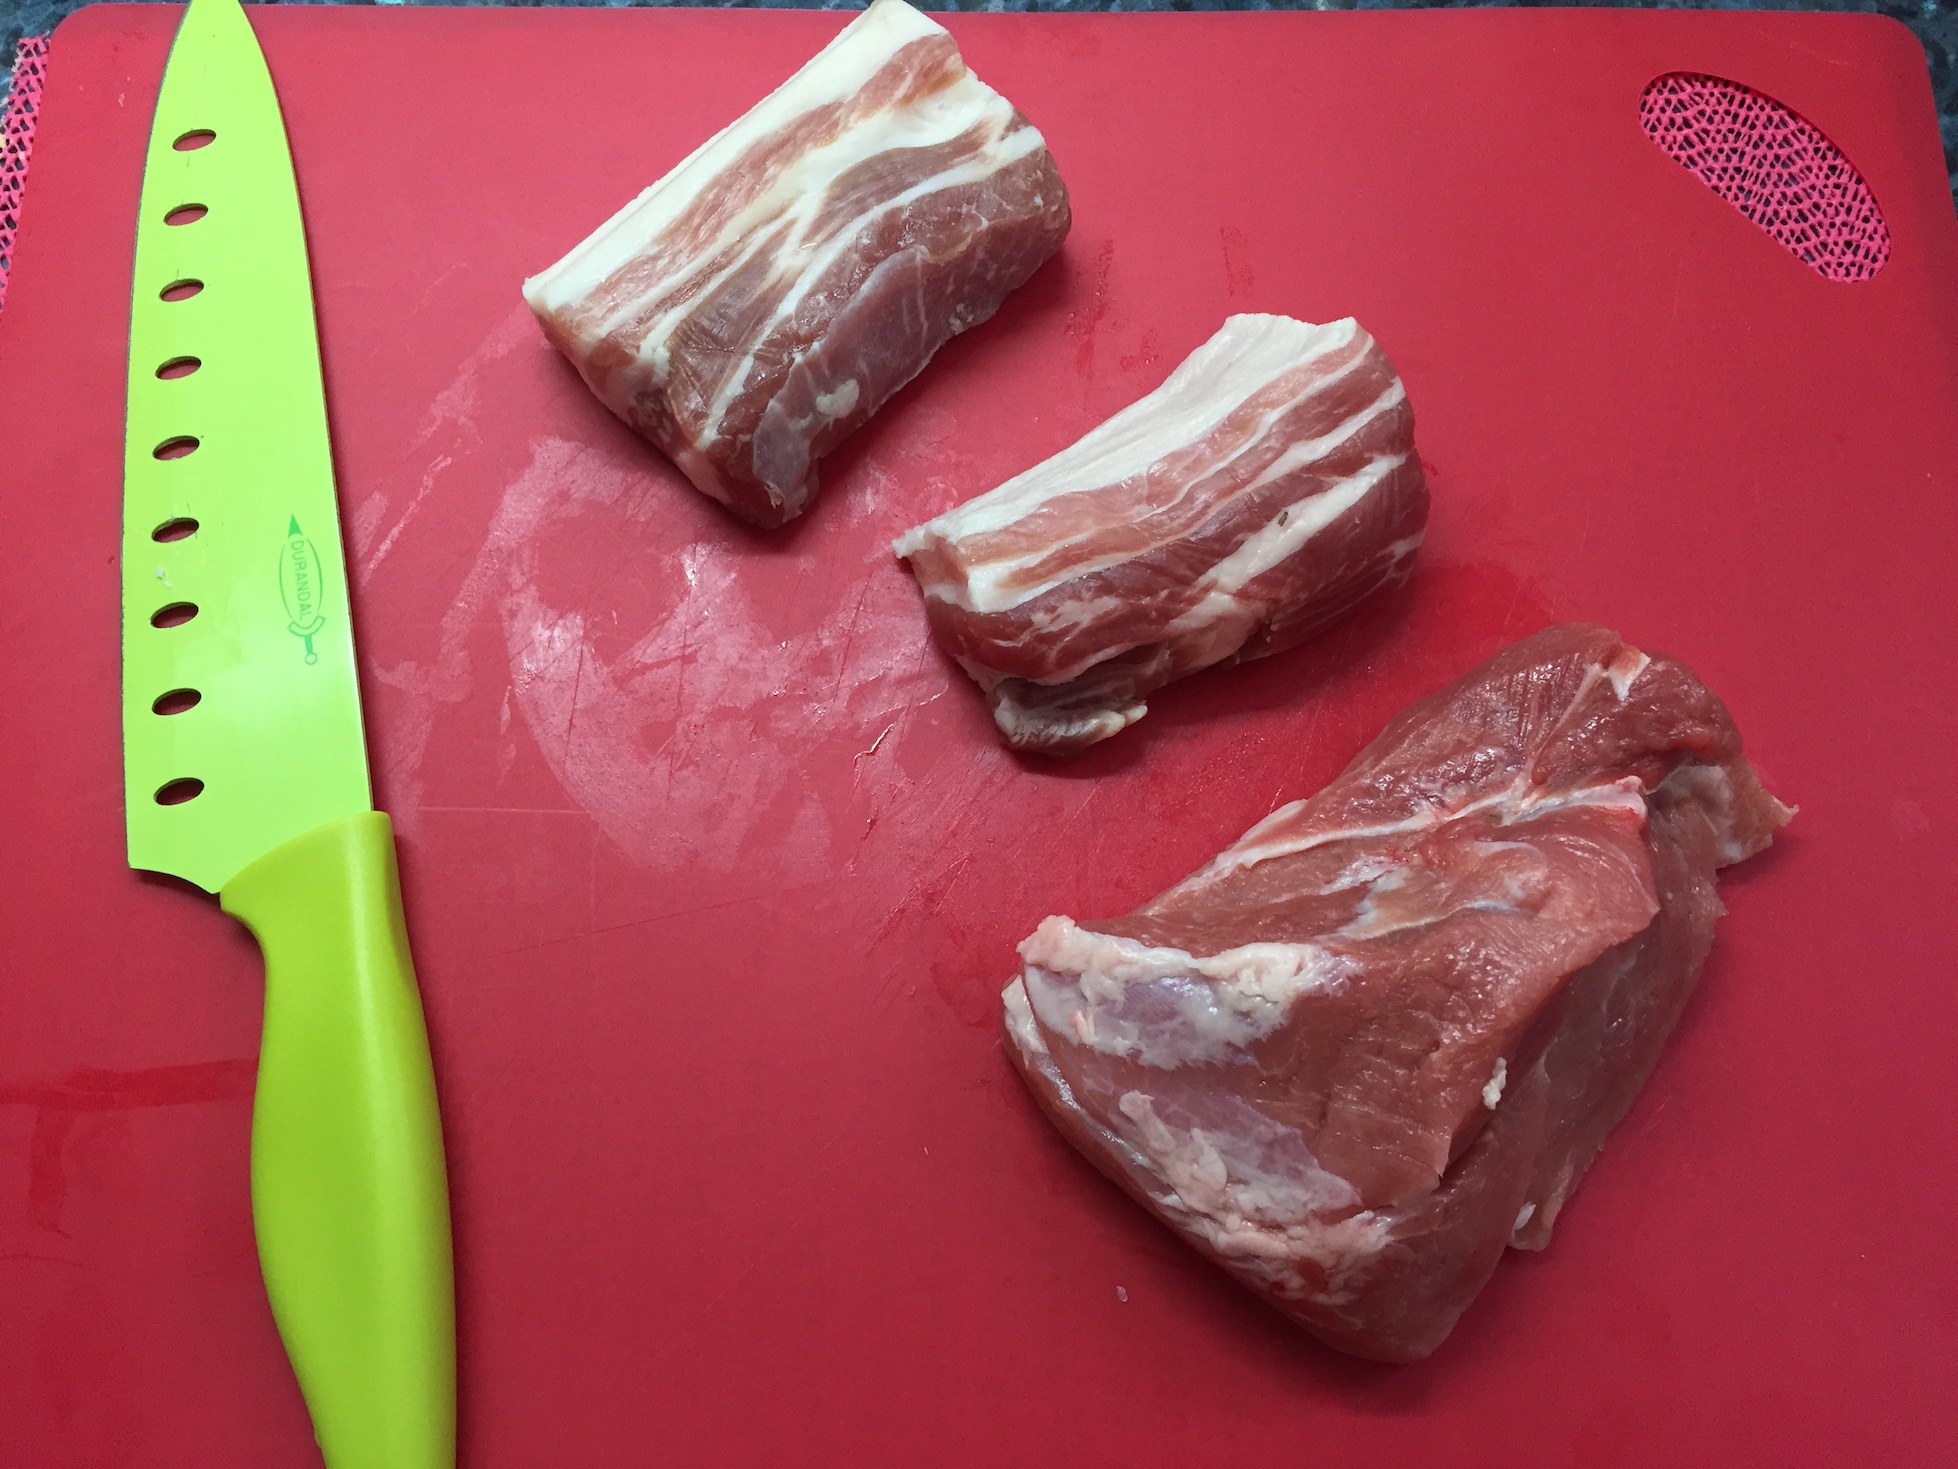
As I have no mincer here in Spain, I hand-chopped the bacon and the lean pork. Very small pieces, which took about 50 mins.

  • 1 tablespoon               Brandy (possibly try 2 tablespoons next time).
  • 3 tablespoons             Orange juice (freshly squeezed) – perhaps juice of a full orange next time.
  • 1¼ t/spoon      each    paprika, ground cumin, sage, thyme.
  • ½ t/spoon        each    ground black pepper, salt.
  • ¼ t/spoon                    ground clove. Maybe a little less next time – certainly no more.

Garnish

I peeled and cut up a ripe pear (only because I had one ready for use) and used the strips of pear alongside gherkins to decorate. It might be nice to use a second pear next time.

IMG_9525

Method

As I say, all of the meat should be minced and thoroughly mixed together before re-mincing about half of the mix.  This will give a varied texture to the finished product.

Now mix all of the ingredients together and if you have time, leave them to marinade for an hour or so, overnight would be good.

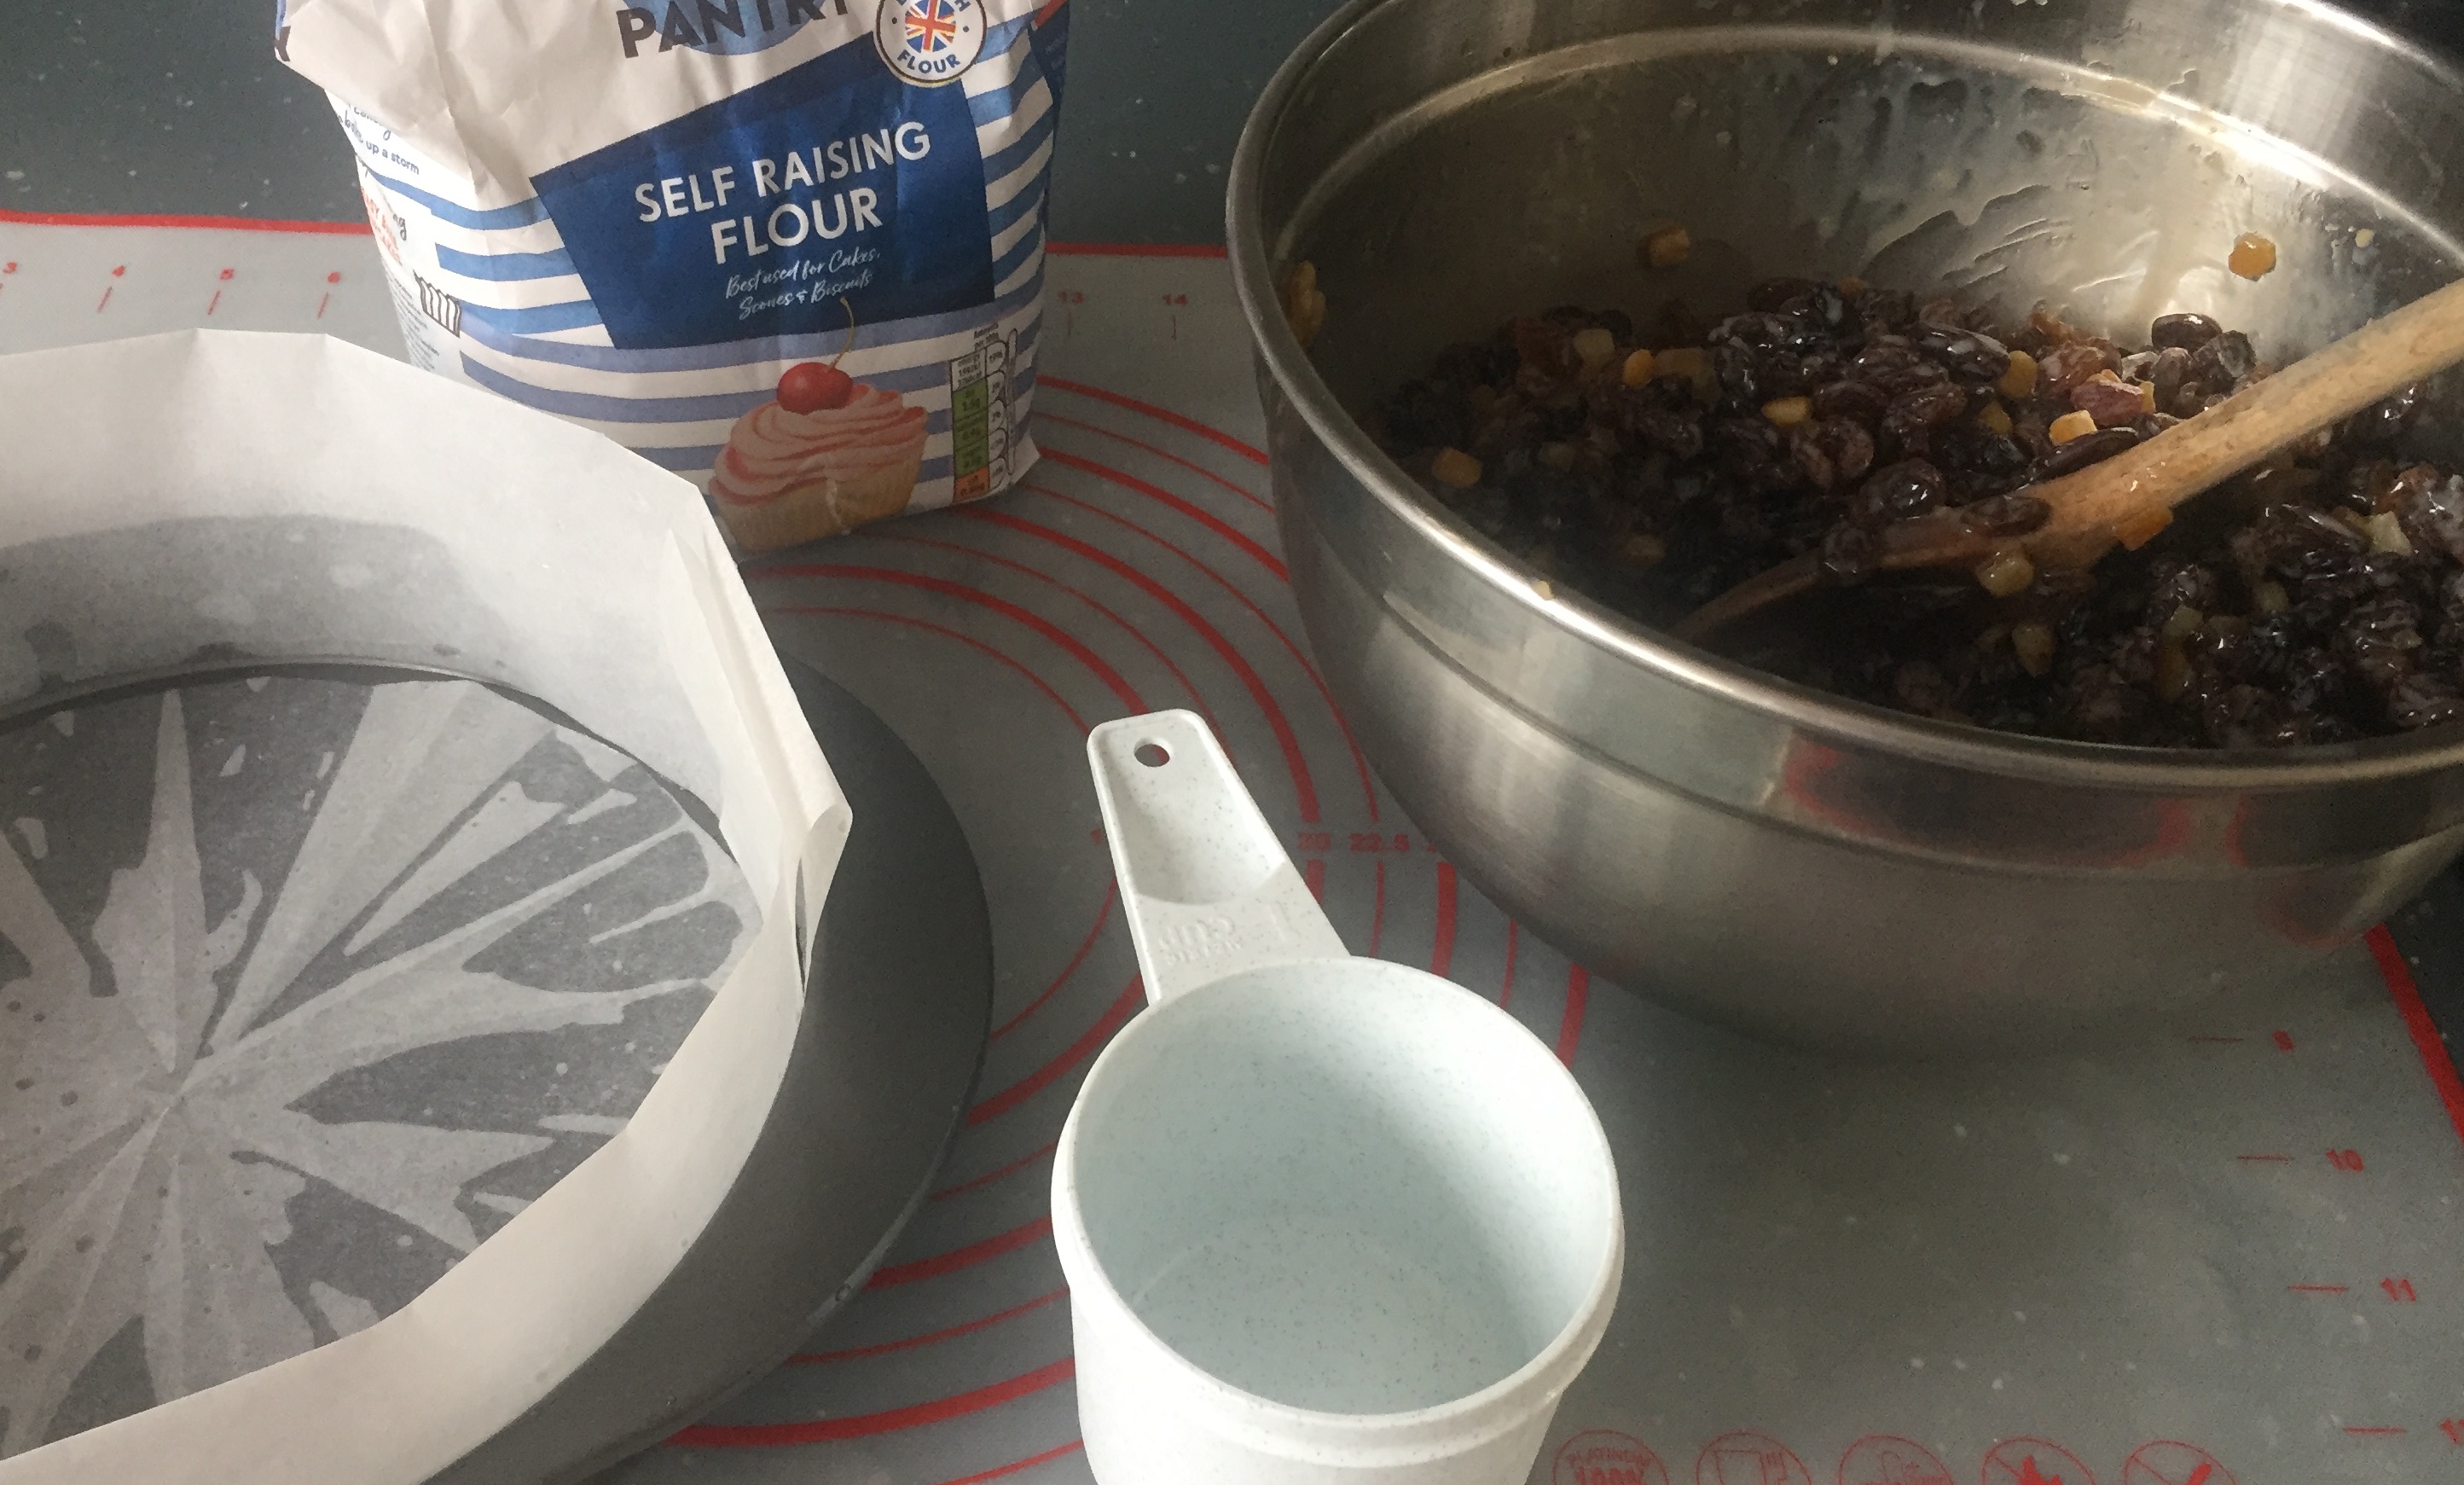
Prepare your terrine. Most recipes ask you to line this with streaky bacon, but that’s your choice – it does add to the cost (so far this has cost less than €5.25- about £4.75).

Instead, I lined the dish with folded baking parchment AND cling film.  The paper helps to protect the meat during cooking and the cling film holds it all together when cooked – there should be enough cling film to cover the meat entirely.

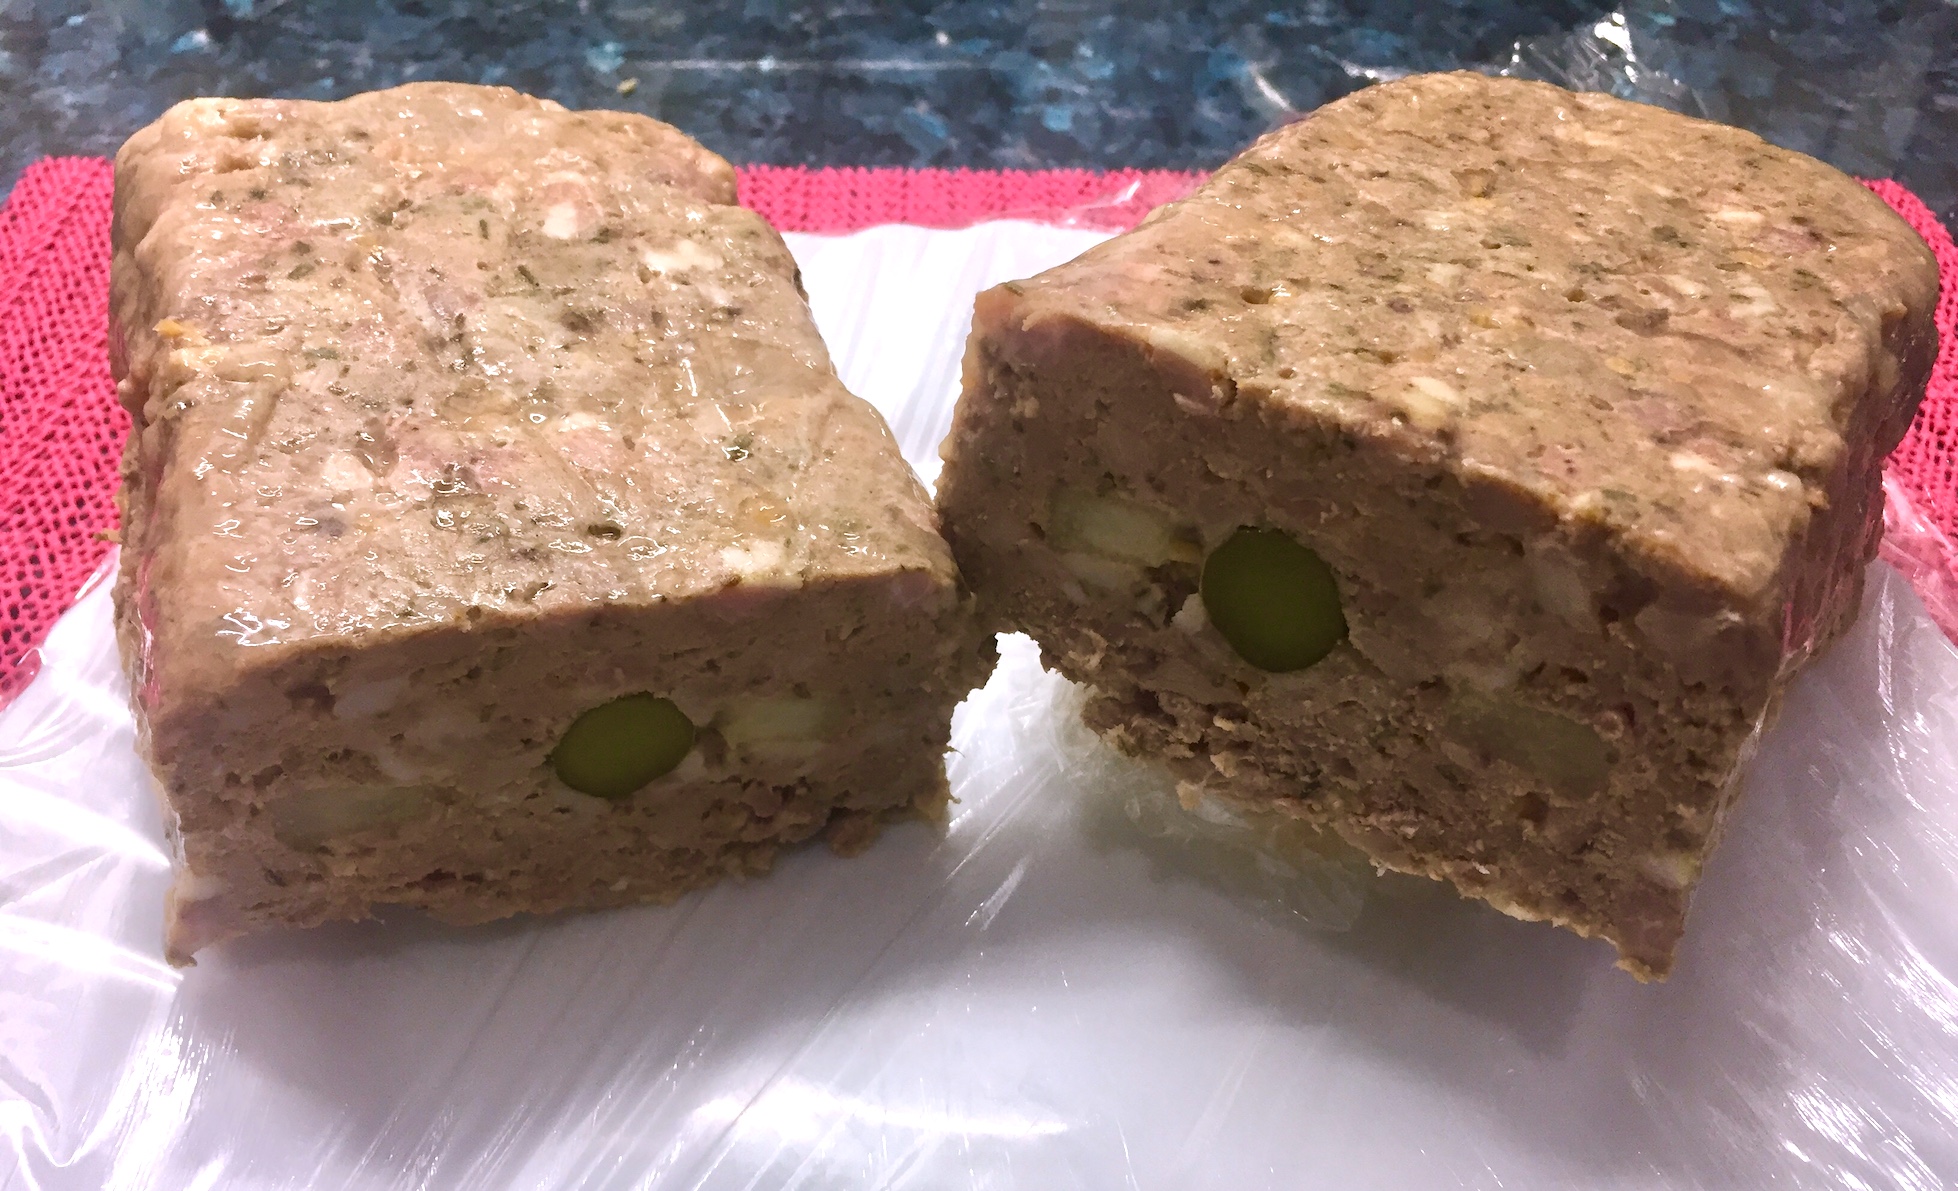
Now pack the mix into the terrine.  I put half the mix in the bottom, pushing right into the corners – fiddly because of the paper; then I added the layers of pear and gherkin, before adding the rest of the meat mix. Push down firmly.

Preheat the oven to 1600C.  It could be a little lower if using a fan oven.

Cover with the terrine lid (or a double layer of aluminium foil if you have no lid) and place the terrine into a small roasting tray. Add enough just-boiled water to the roasting tin to come 2/3rd of the way up the outside of the terrine. Cook in the centre of the oven for 1½ hours.

When it’s ready (test with a skewer – if it comes out hot after a few seconds, it’s ready) remove from the roasting tray.  Remove the lid and cover with a triple folded layer of tinfoil. Add weights to the top (I used some tins of tomato) and allow to cool.

IMG_9528

Refrigerate overnight.

Cut and serve with a pickle of your choice.


September 2, 2013

Baba Ganoush

Fruit VegetablesI went into town today to the much depleted ‘Monday’ market (it’s there again on Tuesday, Thursday and Saturdays as far as I am aware!) with a view to buying some vegetables.

I’d a mind to make some ratatouille because I already had a huge courgette. This had come to me in the form of a marrow, but the skin was till tender – so I thought it’d do for ratatouille.

All of the vegetables were at a good price; even the aubergines – 4 for £1.

I had enough for my planned dish with just one aubergine, so I decided to make baba ganoush.

Ingredients

  • 3 medium aubergines
  • half onion (roughly chopped)
  • 5 cloves garlic (4 whole, 1 crushed)
  • sesame seeds
  • oil and seasonings
  • You also need a food processor.

1) Brush the aubergines with oil, cut them in half lengthways and bake/roast for about half an hour, until the skin starts to shrivel a bit. I also scored the skin on each of the halves – this helped later.

2) Add four whole garlic cloves to the same tray as the aubergines. No need to peel these.

3) Cook the onions and crushed garlic clove in a little oil until very tender.

4) Turn the heat up on the onions and add a good tablespoon (to taste) of sesame seeds and stir well until lightly browned (onions and seeds).

By now the vegetables should be well roasted. Remove them from the oven.

5) Carefully remove the black skin from the aubergine (remember these are HOT) and place all of the cooked flesh (not the skin) into the food processor along with the onion/garlic/sesame seed mixture.

6) Scrape the inside of the black skin to remove all usable flesh and add this to the food processor too.

7) Squeeze the now soft contents of the four garlic cloves into the food processor too.

8) Whiz/blitz/process the lot to a paste.

9) Season to taste

Enjoy 🙂

April 14, 2013

Iberian White Bean Stew.

Filed under: Meat,Vegetables — David Sugden @ 6:52 pm
Tags: , , , , , , ,

picture of finished dish

This may might not be an ‘authentic’ Iberian White Bean Stew, but I was in Iberia, I used white beans and other authentic ingredients – so I called it what it was!

Sharon and I spent Easter in Spain. We have use of a one-bedroom apartment in Torreblanca Del Sol, so quite a bit of our grub was home made (self catered).

One of the really nice things about Spain (and France to a certain degree) is the availability of bottled vegetables (and scrumptious unevenly shaped, very tasty fresh vegetables). I’m not fussed for most tinned, bottled, frozen or generally buggered about with vegetables but bottled beans are a fabulous addition to any soup or stew. Tinned ones are OK too but once the tin is open – it’s open, whereas a bottle can be resealed and put back in the fridge for an other day. We had this twice during the week we were there 🙂

View from aprtment windowThe Spanish, like most European countries, have a fine tradition of dried meat sausages – Chorizo to name just one. We chose a popular, less spicy sausage to use with the stew, and a variety of vegetables. We also used Tomate Frito.

First of all, I chopped up an onion (diced) and fried it, along with some crushed garlic and some chunks (diced) of sausage. About five minutes, nice and steady. While that was cooking, I had diced some potato (one large) and chopped some celery (two stalks) – I now added these and turned the heat up a little. Cooked for another 3-4 minutes.

I then added about a tablespoon of water and let the ingredients steam until dry again, before adding half a chopped (diced) courgette and half a chopped (diced) red pepper. The water brings off any residue that has stuck to the pan and adds some necessary moisture. Mix well, then add a pack of Tomate Frito, half a bottle of white butter beans, bring back to the boil and simmer for about half an hour.

The seasoning for the stew was haphazard, because there wasn’t much in the cupboard to play with. It got salt and black pepper, some oregano and a little cumin – but that was that.

We ate it with some small wraps and a bottle of beer (or two).

One note on Tomate Frito – it tasted a bit like Heinz Tomato Soup – so beware when tasting for seasoning 😉

February 25, 2013

Turkey and Ham

Filed under: Info,Meat,Poultry,Uncategorized — David Sugden @ 10:59 am
Tags: , , , , , , , , ,

Large jar of NutellaI went up to the butchers the other day and they had a special offer on ‘Turkey Wings’ – @50p each.

50p EACH. (Turkey wings are HUGE).

I thought that that was a real bargain so I bought three.

Also, just before Christmas I’d stripped the meat off of a Ham Shank and froze it raw (I’d just wanted the bone to flavour some brisket I was cooking at that time) and now thought that the ham meat and turkey, cooked together, would make a tasty meal or two.

It did better than that …

I put the wings on to boil with two carrots, an onion, a leek (I had no celery and neither had the local Aldi or the local co-op), some peppercorns and parsley, and after about 20 minutes simmering, I added the de-frosted ham. A further two hours or so simmering and they were cooked.

Now was the fun bit.

I separated the stock from the cooked meat and set that aside to cool overnight. As the meat cooled, I started to strip all of the skin and fat from it, leaving lean, meaty chunks of turkey and ham. I chopped these into a size suitable for pies etc. before covering them with a little of the stock. These too were set aside overnight to cool (by ‘cool’ I mean ‘go very very cold’).

By the following morning, all of the fat had risen to the top of the stock and solidified (as much as poultry fat will ever solidify) and the stock had partially jellified.

I scooped all of the fat into a pan – there was a fair bit of it – and put the pan on heat and simmered it for about 20 minutes. This simmering (rendering) removed any of the stock remaining on/in the fat and left me with a pure turkey/ham fat, which I then used to cook that afternoon’s family meal Yorkshire puddings and roast potatoes in. MMmmm, tasty.

After reducing it for half an hour (bringing to the boil and then simmering) the stock itself was used to make the velouté sauce required to bind the meats together for use in pies etc. It was also used to add body to the gravy made from that afternoon’s ‘joint’ juices.

The £1.50 worth of turkey and £2.50 worth of ham shank meat eventually made 12 portions of turkey and ham pie filling. Even with the cost of additional ingredients and gas, I reckon that that’s a really tasty bargain.

Next Page »

Create a free website or blog at WordPress.com.